1 Jun 2012
Timber Frame Shed Master Plan….
This post explores some of the thoughts leading to the design of my first ‘real’ Timber Frame project, a small garden shed for our back yard. I would love for this to be interactive, please comment!
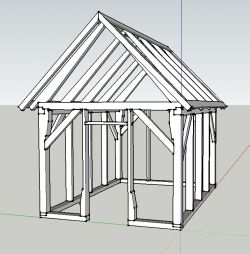
The intro picture is a screenshot of a SketchUp model of the design. The foot print is 10×14 feet with a 6/12 pitch roof. The following sections cover the main points. Despite the simplicity, one square box, I was surprised by the number of decisions that had to be made. The process of working through the details really makes me appreciate the complexity of a larger scale structure.
Size Matters, Among Other Things…
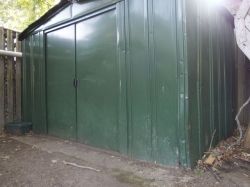
We currently have a steel shed in the back yard, so why the effort to build a replacement?
Well, to begin, calling it a steel shed is kind of like saying precious costume jewelry. It has been standing in the back yard through enough seasons that the roof has rusted through here and there; picture thinly sliced Swiss Cheese. A temporary roof of asphalt shingles over OSB was added to keep the water out as a temporary fix. This was done by the last owner of the property, and I’m not going to mention how many years ago we moved in. The exterior walls aren’t that much better. A few years back my daughter was so aggravated by the rust splotched look she took a can of ‘Rust-Oleum’ in forest green and gave it a new look. Plug for the paint, it’s held up remarkably well with next to no surface prep.
Having said all that, I still tend to overlook these short comings for the most part. It’s back there holding ‘stuff’ just fine. Then I have to get a rake or shovel out and the dysfunction starts screaming, beginning with the two ‘sliding’ doors. They have long ago lost any bushings. The tracks the doors are suppose to slide along are so far from straight it’s not worth trying to describe their condition. And once you manage to get them open the unit is so short you have to lay the tools on a shelf rather than stand them up or hang them from a support on the wall. Have you ever tried to pry apart half a dozen rakes and shovels laying in a pile on a shelf. Don’t torture yourself. Oh, and don’t forget to remain hunched over while you do this unless you know your tetanus shots are up-to-date, remember the roofing nails poking through the ceiling? It is beyond me why any company imagined it was a good idea to build a shed this short and even more of a mystery why some one put out hard earned money to reward their foolishness by buying it.
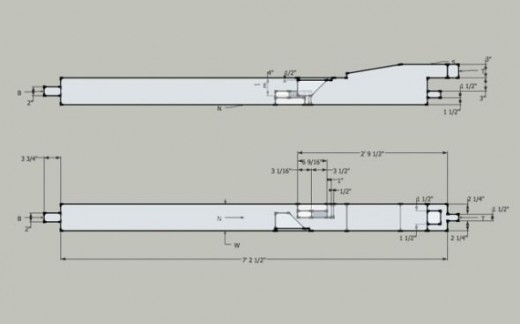
So, I imagine building something tall enough to handle the tools needed to keep up the yard, big enough to hold that pile of ‘stuff’ in an orderly fashion, and put together in a manner that will last more than a few handfuls of years. Other consideration are Do It Yourself and aesthetically pleasing. How’s that for design goals?
Foundation…
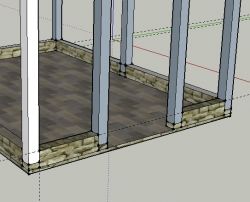
Only a few thoughts here. The combination of small foot print and desire for overhead storage space results in a rather overly tall looking design. I didn’t want to add even more vertical by putting the shed ‘up’ on a foundation. To break up the vertical rise a bit I decided to use the foundation as part of the wall. That is, I didn’t put the floor at the level of the sill but bellow it. I did this on my last shed and it worked quite well.
Gunstock Door Frame…
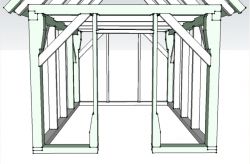
One of the effects of the foundation being part of the wall is the the sill is broken up buy the door. No big deal, until I started drawing in the joints where the posts meet the sill for the door opening. Not enough material. This stumped me for a little while, then it finally hit me. Gunstock posts don’t have to point down, they can just as easily be inverted and point up. The first run at this was ok, but it just didn’t seem right. Then I realized what was holding it back. The corner posts had the wider portion in line with the longer wall and perpendicular to the door posts, opposite of the door posts. Turning them 90 degrees so the wide edge of the posts face each other has the right look. Now they bracket the space and compliment nicely.

This item is mostly whim. After modeling the shed I just wasn’t satisfied with the way it looked. Not sure why but it just seemed too clunky or something. After trying this and that I came up with the idea of tapering the rafters. Not a big deal, but I think it adds a nice touch.
… what do you think about these design elements?
I really like the tapered elements. They remove a lot of what people call the ‘clunkyness’ of usual all square timber framing. Do you have a large bandsaw to cut these? I would worry that doing that with a chain saw would be unwieldy. Sadly the part of timber framing that is the most beautiful is usually hidden from view by the sheathing, unless you inset the wall the make the frame proud of the wall materials. Is that the plan?
Al, thanks for your thoughts, on point (as usual :-). So, yes to the tapers. I had come up with the ‘gunstock’ idea pretty early as a way to handle the joint given the size the the shed – too small for the massive beams needed for that complex 4 way joint. And I may cheat a little and put screw in down through the rafter to help with wind load, like a hurricane strap – and it will be totally hidden. At some point I would like to hear from a ‘pro’ on what I came up with, perhaps I’ll take a formal class one day?
Then the rafters. As soon as I drew them in it was yikes, just too much. I mulled it over for a couple of weeks. Poking and thinking. shrunk it over all, still not good. Then it kinda hit me… just taper the whole thing.
As to cutting… one of the beauties of the mill I have is that the log lift is effectively two independent geared tracks – so I adjust one high and the other low then mill to shape. Easy(ish)!